30 Dec 2018

FREE cutting file - Accessory Trays


Hiya, over on the Silhouette UK Blog this weekend I have a project to help organise all those invaluable Silhouette bits and pieces that accumulate when you use your machine. I used the Two Compartment Candy Box by Lori Whitlock, added some custom-designed accessory trays, and decorated the outside with panels cut from Silhouette Wood Effect Vinyl. I included a FREE accessory tray file too to keep blades, penholders and sketch pens all in one place.

You can also download the FREE Accessory Trays cut file here. The file is in .GSD format which can be opened with any edition of the Silhouette Studio software. From the Silhouette program select File > Open, then navigate to the downloaded file and click OK.

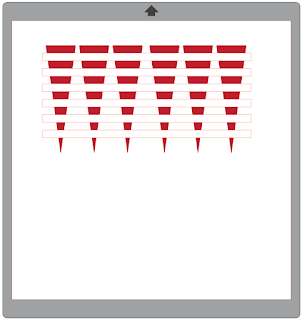
There are two versions in the file, one is taller than the other. The taller one is for sketch pens, to bring the coloured tops closer to the top. It also has more holes which are a fraction larger. The shorter one accommodates all the blades and is sized to allow the AutoBlade enough headroom, as it is taller than the others.

You can mix and match the holes, just Ungroup each version (select one, right mouse click, select Ungroup) and duplicate or swap the sets of holes.


You can also adjust the size and spacing of the holes.

To adjust the size, duplicate a set of holes, move it to one side and adjust all the circles simultaneously (hold down Shift, Alt, Cmd on a Mac and move one of the corner sizing handles either in or out). If you increase the size, check that they still fit within the square part of the tray. If not, you can adjust the spacing, as shown below.


To adjust the spacing, duplicate as above and ungroup the set of holes (select, right click, Ungroup, then Ungroup again). Using the Drawing Tools, draw a square over the existing dotted lines and then move it over the duplicate set of ungrouped dots.

If you need to make the holes larger than the above method allows (if they overlap the edges) then select one of the holes, open the Transform panel, and adjust the with and height as required (I chose 1" to accommodate a Stickles bottle).
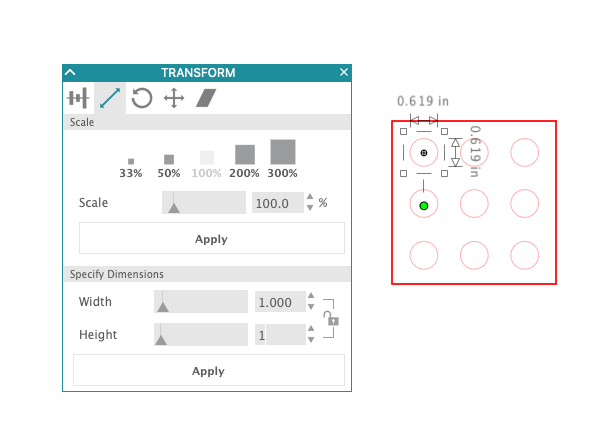
Delete the remaining holes and using the Replicate panel, select the remaining hole and make a row of three.
Then space them evenly within the square by clicking on the Horizontal Spacing in the Transform panel.


Then group and then duplicate the row using column of three in the Replicate panel.


Then space the holes evenly using the vertical option in the Transform panel.


When you are happy with the spacing delete the square, group holes, and move them back to the tray, deleting or moving the original set.


For the ideal storage of Stickles and similar sized bottles, the legs will need to be shorter (even shorter than the short-legged version). You can adjust the height either up or down by using point editing of the points on the end of each leg. I'll save that explanation for another post. If you are in need of it meantime, let me know and I'll expedite it!


I hope you'll find this useful.


Happy New Year!


Designs used:


19 Dec 2018

8 ways and more to customise your Christmas Gnomes - the Gnome SVG from Simply Crafty SVGs


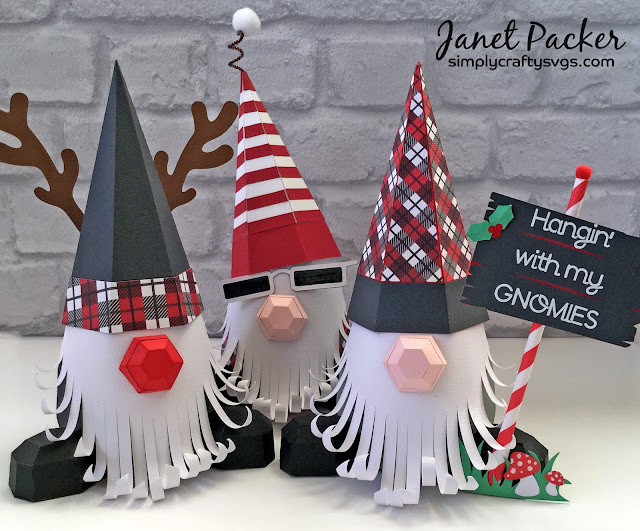
Christmas Gnomes from the Simply Crafty SVGs Gnome Box file by Janet Packer CraftingQuine.

Once in a while an SVG project comes along that you fall in love with. This month I've fallen for the Gnome Box SVG file from Simply Crafty SVGs. The gnomes are so easy to customise and I've shared my hints  and ideas hoping that they will give you ideas and inspiration for your own customisations. I used my Silhouette Cameo to cut the file pieces, but any digital cutter which reads SVG files should work.


Let me introduce you to the gnomes I made ...

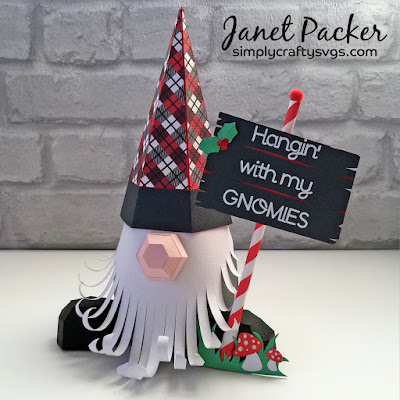
Sign Post Gnome

Christmas Gnomes from the Simply Crafty SVGs Gnome Box file by Janet Packer CraftingQuine.


Cool Dude Gnome

Christmas Gnomes from the Simply Crafty SVGs Gnome Box file by Janet Packer CraftingQuine.


& Rudolph Gnome

Christmas Gnomes from the Simply Crafty SVGs Gnome Box file by Janet Packer CraftingQuine.


Now for the customisations (I had such fun with these)!

1. Curl that Beard!
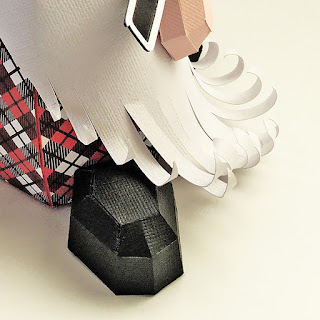
Use a pencil, marker, or any item with a round barrel, and curl each piece of the beard individually - this gives great texture to the beard. Consider adding a second beard on top of the first for additional volume.

Christmas Gnomes from the Simply Crafty SVGs Gnome Box file by Janet Packer CraftingQuine.


2. Add Embellishments
Add items from your stash. Here I've used a ready-made white pompom and a mini pipe cleaner to make a fun embellishment for the hat on the cool gnome.

Christmas Gnomes from the Simply Crafty SVGs Gnome Box file by Janet Packer CraftingQuine.


3. Add Printable Patterns
Use printable patterns to make panels for the hat and body. The Silhouette Studio software allows you to tile, rescale and rotate the pattern to suit your pattern pieces.

Christmas Gnomes from the Simply Crafty SVGs Gnome Box file by Janet Packer CraftingQuine.


4. Add a Sign Post
To make a quick post for your sign use a paper straw. Trim the straw to length and squash the lower end to give a bigger surface area to adhere to the gnome's foot. Add a bead or mini pompom to the top end.

Christmas Gnomes from the Simply Crafty SVGs Gnome Box file by Janet Packer CraftingQuine.


5. Make a Sign
Make a sign to add to the sign post. I used the board from the Wooden Sign file from the Silhouette Design Store. The words were cut from white, or red sign vinyl using a stencil font. Attach the sign board to the post using an adhesive foam pad (file details are linked below).

Christmas Gnomes from the Simply Crafty SVGs Gnome Box file by Janet Packer CraftingQuine.


Using other elements from the sign file help to ground the sign.

Christmas Gnomes from the Simply Crafty SVGs Gnome Box file by Janet Packer CraftingQuine.


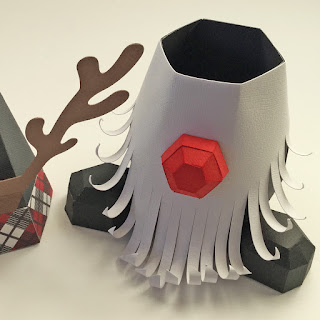
6. Colour that Nose
Change out the nose for the Rudolph gnome to red card. I had cut extra pale pink noses, and recoloured one using stamping ink and a blending tool.

Christmas Gnomes from the Simply Crafty SVGs Gnome Box file by Janet Packer CraftingQuine.


7. Add Accessories
Accessorise your gnomes with items from a set of photo props reduced in size to match the scale of the gnomes.  I copied and flipped one of the antlers from a set and welded them to a triangular shape. Once cut from brown card they were then adhered to the rear of the Rudolph gnome's hat. This opens up all manner of variations. For example, an Easter set could be used to make the gnomes into an Easter bunny - just add ears to the hat.

Christmas Gnomes from the Simply Crafty SVGs Gnome Box file by Janet Packer CraftingQuine.


From the same set I cut a set of eye glasses from white cardstock and added black cardstock behind and flooded the well with liquid glaze to make dark lenses for the cool gnome's shades.

Christmas Gnomes from the Simply Crafty SVGs Gnome Box file by Janet Packer CraftingQuine.


8. Add Stripes
If you don't have striped paper in the desired colour, adapt plain panels by subtracting rectangles from the panels lined up side-by-side. Once cut, use the waste sheet as a guide to align the individual stripes plain panel pieces in a contrasting colour.

Christmas Gnomes from the Simply Crafty SVGs Gnome Box file by Janet Packer CraftingQuine.


Christmas Gnomes from the Simply Crafty SVGs Gnome Box file by Janet Packer CraftingQuine.


Here are the details of the materials and files I used.

Materials Used:
Medium Weight American Crafts Textured Cardstock in
White, Black, Red, Dark Grey, Pale Gray, Grass Green, & Pale Pink
Beacon 3-in-1 Adhesive
Plaid Paper or Digital Paper Pattern & Printer
Silhouette Cameo or other digital cutter

Extras for Sign Post Gnome:
Stripy Paper Straw
White Sign Vinyl
Adhesive Foam Pad
Small Red PomPom, or a Wooden Bead
Textured Cardstock in Grass Green plus assorted scraps

Extras for Cool Dude Gnome:
Nuvo Drops Clear Glaze
Small Pompom
Thin Pipe Cleaner

Extras for Rudolph Gnome:
Textured Cardstock in Brown
Tim Holtz Distress Ink in Barn Red & Blending Tool or
Textured Cardstock in Red


Files Used:
Simply Crafty SVGs Gnome

Other Digital Files:
Wooden Sign by Lisa Norris (Studio or SVG)
Christmas Photo Props by Silhouette (Studio or SVG)
PN Moneymaking Stencil Font by ScrapNfonts
Christmas Red Buffalo Check Pattern by Miss Kate Cuttables (Studio or JPG)


These gnomes are such fun to make - do try them. I'd love to see the results, so do tag me in your social media posts.


Janet, DT Member Simply Crafty SVGs

Blog: Crafting Quine
Instagram: @CraftingQuine
Facebook: Janet Packer Crafting Quine


13 Dec 2018

Make your own glitter card and paper

Using Silhouette Glitter Sticker Sheets to make your own glitter paper and card. Designed by Janet Packer for GraphtecGB Silhouette UK at https://www.craftingquine.blogspot.co.uk. Uses the Polar Bear Card by Jennifer Rush from the Silhouette Design Store.


Hello, over on the Silhouette UK Blog I've been using the Silhouette Glitter Sheets. This is one of my favourite Silhouette media as it is so versatile. It can be used for Print & Cut, but here I've simply printed it all over in a couple of colours and then cut out my shapes. I call this Print THEN Cut!


Using Silhouette Glitter Sticker Sheets to make your own glitter paper and card. Designed by Janet Packer for GraphtecGB Silhouette UK at https://www.craftingquine.blogspot.co.uk. Uses the Polar Bear Card by Jennifer Rush from the Silhouette Design Store.


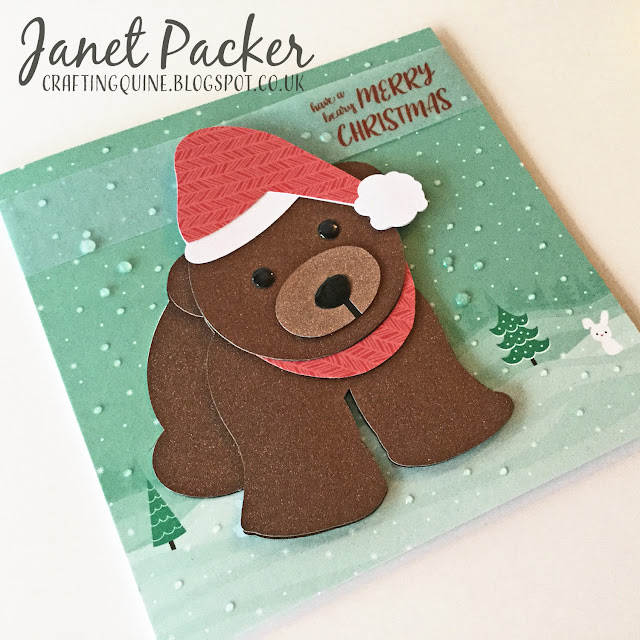
I made two shades of brown glitter card to transform the Stacked Polar Bear Card, by Jennifer Rush, into a cute a cuddly brown bear. Details on how to make the glitter paper and card, togther with details on making the card are over on the Silhouette UK Blog, so do pop over there to get more info.

Using Silhouette Glitter Sticker Sheets to make your own glitter paper and card. Designed by Janet Packer for GraphtecGB Silhouette UK at https://www.craftingquine.blogspot.co.uk. Uses the Polar Bear Card by Jennifer Rush from the Silhouette Design Store.


I'm rather fond of this little bear with his friendly expression.

Using Silhouette Glitter Sticker Sheets to make your own glitter paper and card. Designed by Janet Packer for GraphtecGB Silhouette UK at https://www.craftingquine.blogspot.co.uk. Uses the Polar Bear Card by Jennifer Rush from the Silhouette Design Store.


8 Dec 2018

Zig Zag Village Card - Line Segment Overcut

How and When to use the Overcut cut setting in Silhouette Studio software - Zig Zag Village folding Card by Marji Roy - by Janet Packer http://craftingquine.blogspot.co.uk for graphtecGB / Silhouette UK Blog


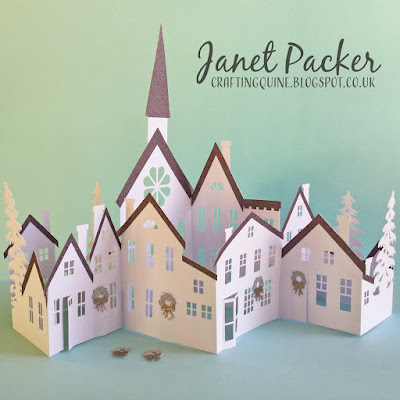
Hello, today I'm over on the Silhouette UK Blog with a post about using the overcut feature in the Silhouette Studio software. It features this beautiful folding Zig Zag Village Card by Marji Roy. The card design is fabulous, but I didn't cut it very well first time around. On the second time around I used the Line Segment Overcut feature and the improvement was amazing!


How and When to use the Overcut cut setting in Silhouette Studio software - Zig Zag Village folding Card by Marji Roy - by Janet Packer http://craftingquine.blogspot.co.uk for graphtecGB / Silhouette UK Blog


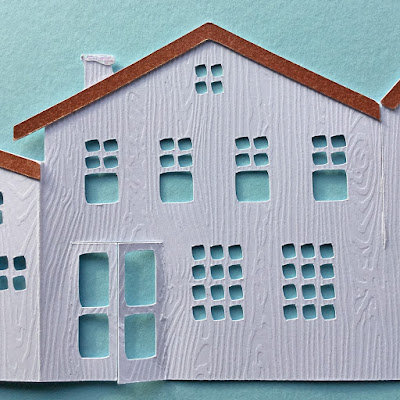
If you look closely, you'll see that the squares and rectangles are not really square - all the corners are rounded.

How and When to use the Overcut cut setting in Silhouette Studio software - Zig Zag Village folding Card by Marji Roy - by Janet Packer http://craftingquine.blogspot.co.uk for graphtecGB / Silhouette UK Blog
First attempt with Overcut turned off


When I used Overcut (with all other settings the same) the cuts were crisper and more square.

How and When to use the Overcut cut setting in Silhouette Studio software - Zig Zag Village folding Card by Marji Roy - by Janet Packer http://craftingquine.blogspot.co.uk for graphtecGB / Silhouette UK Blog
Second attempt with Overcut on

The post over on the Silhouette UK Blog describe the feature and explain how, and where to use it.

The overcut feature also assisted in cutting out the teeny tiny wreaths successfully.

How and When to use the Overcut cut setting in Silhouette Studio software - Zig Zag Village folding Card by Marji Roy - by Janet Packer http://craftingquine.blogspot.co.uk for graphtecGB / Silhouette UK Blog


These were enhanced using my favourite embossing powder - more effective than cutting them out from metallic card.

How and When to use the Overcut cut setting in Silhouette Studio software - Zig Zag Village folding Card by Marji Roy - by Janet Packer http://craftingquine.blogspot.co.uk for graphtecGB / Silhouette UK Blog


I'll be making a few of these for the special folks on my Christmas card list.


1 Dec 2018

Tiny Tea Light Houses

Tiny Tealight Gingerbread Hanging Tree Ornaments made with Silhouette Faux Leather Paper by Janet Packer https://craftingquine.blogspot.co.uk for Silhouette UK - GraphtecGB


Hello, this week I've been making some new Christmas Tree decorations using Silhouette's Faux Leather Paper. The natural shade is perfect to use for gingerbread-look projects and I really enjoyed using it to make these miniature Tealight Houses. The design used is the Tiny Gingerbread House by Amanda McGee from the Silhouette Design Store. This year I'll be giving these as to friends - as "from our house to your's" gifts.

Tiny Tealight Gingerbread Hanging Tree Ornaments made with Silhouette Faux Leather Paper by Janet Packer https://craftingquine.blogspot.co.uk for Silhouette UK - GraphtecGB


What I Used
Silhouette Faux Leather Paper in White and Natural
Oracal 651 Premium vinyl in White and Red
Clear Application Tape
Beacon Fabri Tac Adhesive
6mm Silver Organza Ribbon
Silhouette CAMEO® 3
Silhouette Black Ratchet Blade
Silhouette 12" x 12" Cutting Mat


The post over on the Silhouette UK Blog includes instructions on how to cut the faux leather paper on a Silhouette together with a load of hints and tips. Once assembled a regular tea light fits inside and can be accessed through a flap in the rear of the gingerbread house.

Tiny Tealight Gingerbread Hanging Tree Ornaments made with Silhouette Faux Leather Paper by Janet Packer https://craftingquine.blogspot.co.uk for Silhouette UK - GraphtecGB


24 Nov 2018

A Contemporary Mass-Produced Christmas Card


Hi, I can't believe that November is almost over - where did the month go? Every year I make one or two card designs in multiples, and this year I've picked a contemporary card design by Kristen Magee; the Fa La La Christmas Card (#234355). Over on the Silhouette UK Blog I have a tutorial showing how I simplified this seven-layer card to two-layers with a few additional accents using silver Silhouette Sticker Foil.


In the post I take you through the process of how this card evolved to the point at which I felt I'd made it as easy enough to make in quantity. I reduced the number of layers by bringing in the Print & Cut technique as well as introducing some extra shine with foil sticker paper.


I made a heap of these little accent tags too. I love how teeny tiny I can make them with my Silhouette Cameo.


Materials Used

Silhouette Silver Printable Sticker Foil

Medium-weight White Textured Cardstock

Square Card Blanks

Beacon 3-in1 Advanced Craft Adhesive

Silver Cord

Silhouette CAMEO® 3

Silhouette 12" x 12" Cutting Mat

A3+ Printer (if printing on 12"x12", otherwise an A4 Printer)


DIGITAL DESIGNS USED:


21 Nov 2018

Geometric 3D Christmas Tree Box

Geometric 3d Christmas Tree by Janet Packer Craftingquine.blogspot.co.uk SVG Design by Simply Craft SVGs.

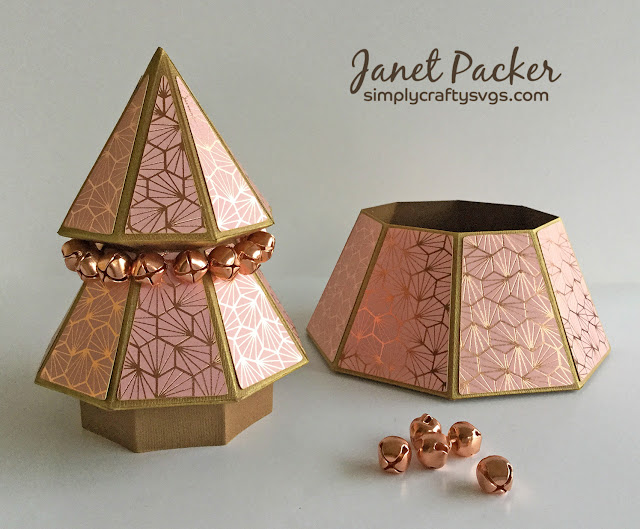
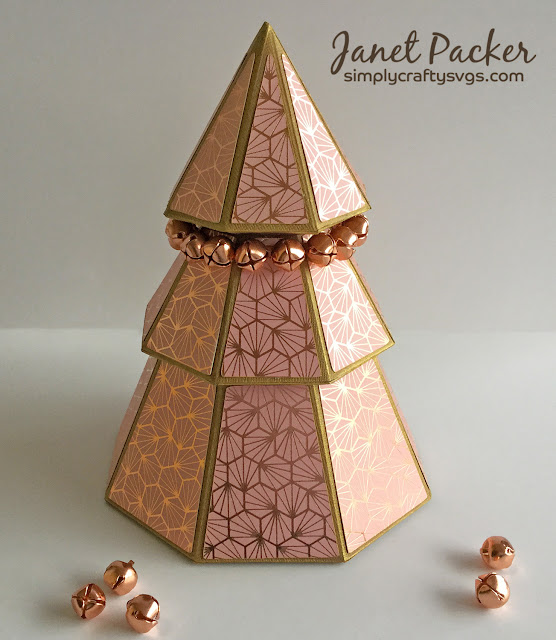
Hi there! Today I'm sharing a sophisticated Christmas decoration using a versatile cutting file from Simply Crafty SVGs.  I've used the Christmas Tree Box, a 3-dimensional tree that can be used as a special gift box, or simply used as a pretty decoration.

Geometric 3d Christmas Tree by Janet Packer Craftingquine.blogspot.co.uk SVG Design by Simply Craft SVGs.


I love metallics, and I love geometric patterns,  and when I saw this fabulous decorative paper I couldn't resist trying out an alternative holiday colour scheme of blush pink and rose gold. It's from the DCWV Lively Geos 12" x 12" paper stack. I used a Silhouette Cameo 3, and the Silhouette Studio Designer Edition of the software to cut all the pieces for the box. However, the SVG files can be used with other desktop cutting machines and software (details here).

Geometric 3d Christmas Tree by Janet Packer Craftingquine.blogspot.co.uk SVG Design by Simply Craft SVGs.


Materials Used:
Walnut Bazzill Textured Cardstock
Octagon Patterned Paper from DCWV Lively Geo 12 x 12 Stack
Beacon 3-in-1 Adhesive
Galaxy Gold Brilliance Dew Drop Ink Pad
Copper Jingle Bells from Paperchase
Silhouette Cameo or other digital die-cutter


Files Used:
Simply Crafty SVGs Christmas tree Box


Cutting the Pieces

This file is very economical in paper use; I rearranged and rotated the pieces a little and cut all the pieces from two sheets of 12-inch square walnut cardstock and one sheet of 12-inch square patterned paper.


Constructing the Box

Sandy of Simply Crafty SVGs has made a fab assembly video for this box. In order to add gold ink to all the fold lines, I assembled the box before adding the decorative panels.

Geometric 3d Christmas Tree by Janet Packer Craftingquine.blogspot.co.uk SVG Design by Simply Craft SVGs.


Decorating the Box

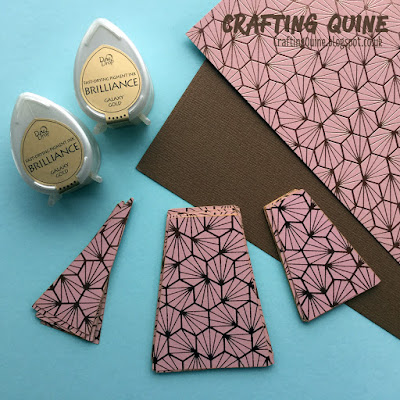
The tear-drop shape of the ink pad  makes it easy to apply gold ink to all the folds.  This gives the box the appearance of being gold all over once the panels are attached. I loved that my clumsy over-inking would be covered too!

Geometric 3d Christmas Tree by Janet Packer Craftingquine.blogspot.co.uk SVG Design by Simply Craft SVGs.


I also inked the edges of the decorative panels to hide the white edges.

Geometric 3d Christmas Tree by Janet Packer Craftingquine.blogspot.co.uk SVG Design by Simply Craft SVGs.


I applied the panels a little higher than suggested in the video so that they were centred. They seemed to fit just fine that way.

Geometric 3d Christmas Tree by Janet Packer Craftingquine.blogspot.co.uk SVG Design by Simply Craft SVGs.


The box was finished off with a string of copper jungle bells tied around the base of the first tier. With hindsight, I'd have hung them individually from the top tier before I attaching the tiers together. I'll certainly do that next time I make one.
Geometric 3d Christmas Tree by Janet Packer Craftingquine.blogspot.co.uk SVG Design by Simply Craft SVGs.


I'm looking forward to adding this to my Christmas decor  - sorry friends, this one's staying at home with me!


Janet, DT Member Simply Crafty SVGs

Blog: Crafting Quine 
Instagram: @CraftingQuine


Simply Crafty SVG Files:
Christmas Tree Box