Hiya, This week I've been having some fun with the Classic Car Trunk Card from Simply Crafty SVGs. This is such a versatile design, great for male or car enthusiast's birthdays, Father's day, and 'get well' occasions (I HAVE to make a 'hope you're back on the road soon' card with this file)! I also thought it would make a fun wedding card, representing the 'going away' vehicle. Being a classic vehicle it would be great for 'vintage' couples. There are so many opportunities for adding text and customisations, and I've shared a few of them here today.
Here's the original design, you can purchase it from Simply Crafty SVGs here. The file comes with a vintage van too - perfect for hipster weddings!
Materials Used:
White Pearl Silver Cardstock
Bronze Metallic Cardstock
Black Lightweight Cardstock or Paper
Bronze Vinyl
White Pearlescent Vellum
White Copy Paper & Printer
Tim Holtz/Sizzix Damask Embossing Folder
Silhouette Cameo, or other cutting machine
Strong Liquid Adhesive
Dimensional Adhesive Pads
Digital Files Used:
Classic Car Trunk Card Set from Simply Crafty SVGs
Stick Figures Bride & Groom by Snapdragon Snippets
Ed's Market Narrow Slant Font by Laura Worthington
Tin Cans by Janet Packer (free download)
THE BASIC CARD SHAPE
Tyres/Tires. I welded tyres on to the basic card to both the front and back fold pieces. I wanted to raise up the vehicle up a little to allow some space for decorations to hang from the fender/bumper. It is a tradition in the UK to hang noisemakers like tin cans, and sometimes old boots, to the wedding going away vehicle. I'm not sure if its the same in the US and other countries. Either way, it allows for some fun additions.
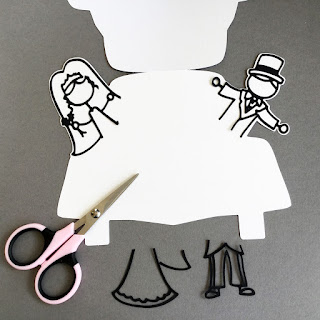
Bride and Groom. I resized the stick figures to be in scale with the vehicle, made small offsets, tilted them and welded the offsets to the front fold of the vehicle card.
Cutting and Assembly. The card was cut from white pearl card, and the tyres and stick figures from lightweight black card. The tyres and trimmed down stick figures were adhered to the card base before the vehicle topper was added.
VEHICLE TOPPER
Rear window. Instead of sticking the window to the vehicle, I decided it would give more interest to set the window behind the topper. I did this by subtracting the window from the vehicle shape in the software prior to cutting the vehicle body from pearl card.
Window. Initially I printed the "Just Married" text on blue vellum (as shown here). Once I started assembling the card I realised that it clashed horribly, so cut the writing from bronze metallic vinyl instead (and changed out the font to Ed's Market), attached it to pearlescent vellum, then mounted it behind the window opening.
Wheel Arches and Trunk. I experimented with a few embossing folders and settled on the Tim Holtz Damask one; it is floral-ish with our being overly feminine. The wheel aches need to be attached first, and then the fender/bumper. I attached the fender onto the wheel arches only, leaving a gap in the central section where decorations could hang later.
Trunk Mounting. Here's an opportunity to add an personal message. After rounding the corners of the truck, I attached it to the vehicle body using a hinge of copy paper. As well as working as a hinge, it provides a writing surface for a little handwritten message.
Trunk Handle. I drew out a number of identical rounded rectangles and adhered them on top of each other to form a handle. The original uses a brad, but I didn't have one in the correct colour, so make the handle instead.
Number/Licence Plate. This is the perfect place to add the names of the bride and groom. I printed mine on copy paper and trimmed it to fit. Here are the colour settings that matched my bronze card. I drew and cut an offset in bronze cardstock to make the plate stand out from the vehicle.
Rear Lights. I wasn't sure whether to cut the lights from red or bronze card. Once I'd got rid of the red writing in the rear window, it was apparent that the red lights would have to go too!
Bumper Decorations. All manner of items can be hung from the bumper, tin cans being the most traditional in the UK. Here is an inspiration photo from a lovely UK wedding blog - The Wedding of My Dreams.
 |
| Photo from The Wedding of My Dreams Blog |
I made some mini cans to hang from the fender/bumper. A free SVG cut file is available to download from the link below the picture (for personal use only). I cut the base pieces in black and the plain decorative piece in vellum and linked them with baker's twine.
 |
| FREE file download SVG |


8 comments:
looks great Janet
Oh wow Janet this is a stunning card. Take care. Hugs Jackie
Fabulous card Janet - great design!! xx
Such a clever addition to the die cut Janet, LOVE the whole thing as I'm sure the couple will too.
Faith
x
A fun card that file is very versatile Janet. Shabneez x
This is such a cute and clever project! Love it!
This is such a great cutting file with many possibilities. Your wedding card is fabulous and I love the addition of the bride and groom, such a fun card.
Sylv xx
This is just TOO cute.
Post a Comment