23 Aug 2018

Glow in the Dark Space Card


Hiya, on the Silhouette UK Blog today, I have a space themed box card featuring glowing embellishments cut from Silhouette's Printable Glow in the Dark Sticker Sheets.

The card design is the Space Rocket Planets 3D Box Card file (#135755) by Snap Dragon Snippets which can be purchased from the Silhouette Design Store, or direct from SVG Attic.

Here are the materials I used in this project:

AC Smooth Navy Cardstock
Patterned Papers (Graphtec GB, All Occasions, and My Mind's Eye, Summer Splash)
Silhouette Glow in the dark Sticker Sheets
Silhouette Metallic Vinyl (red)
Vinyl Scraps (blue, green & yellow)
Double-sided Adhesive Tape
Dimensional Foam Pads
Silhouette Cameo or Portrait

Pop over to the Silhouette UK Blog for more details.


15 Aug 2018

Classic Car Trunk - Wedding Card


Hiya, This week I've been having some fun with the Classic Car Trunk Card from Simply Crafty SVGs. This is such a versatile design, great for male or car enthusiast's birthdays, Father's day, and 'get well' occasions (I HAVE to make a 'hope you're back on the road soon' card with this file)! I also thought it would make a fun wedding card, representing the 'going away' vehicle. Being a classic vehicle it would be great for 'vintage' couples. There are so many opportunities for adding text and customisations, and I've shared a few of them here today.

Here's the original design, you can purchase it from Simply Crafty SVGs here. The file comes with a vintage van too - perfect for hipster weddings!


Materials Used:
White Pearl Silver Cardstock
Bronze Metallic Cardstock
Black Lightweight Cardstock or Paper
Bronze Vinyl
White Pearlescent Vellum
White Copy Paper & Printer
Tim Holtz/Sizzix Damask Embossing Folder
Silhouette Cameo, or other cutting machine
Strong Liquid Adhesive
Dimensional Adhesive Pads

Digital Files Used:
Classic Car Trunk Card Set from Simply Crafty SVGs
Stick Figures Bride & Groom by Snapdragon Snippets
Ed's Market Narrow Slant Font by Laura Worthington
Tin Cans by Janet Packer (free download)


THE BASIC CARD SHAPE 


Tyres/Tires. I welded tyres on to the basic card to both the front and back fold pieces. I wanted to raise up the vehicle up a little to allow some space for decorations to hang from the fender/bumper. It is a tradition in the UK to hang noisemakers like tin cans, and sometimes old boots, to the wedding going away vehicle. I'm not sure if its the same in the US and other countries. Either way, it allows for some fun additions.

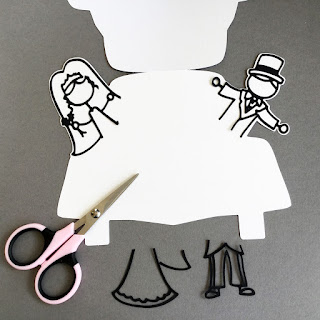
Bride and Groom. I resized the stick figures to be in scale with the vehicle, made small offsets, tilted them and welded the offsets to the front fold of the vehicle card.


Cutting and Assembly. The card was cut from white pearl card, and the tyres and stick figures from lightweight black card. The tyres and trimmed down stick figures were adhered to the card base before the vehicle topper was added.


VEHICLE TOPPER


Rear window. Instead of sticking the window to the vehicle, I decided it would give more interest to set the window behind the topper. I did this by subtracting the window from the vehicle shape in the software prior to cutting the vehicle body from pearl card.

Window. Initially I printed the "Just Married" text on blue vellum (as shown here). Once I started assembling the card I realised that it clashed horribly, so cut the writing from bronze metallic vinyl instead (and changed out the font to Ed's Market), attached it to pearlescent vellum, then mounted it behind the window opening.

Wheel Arches and Trunk. I experimented with a few embossing folders and settled on the Tim Holtz Damask one; it is floral-ish with our being overly feminine. The wheel aches need to be attached first, and then the fender/bumper. I attached the fender onto the wheel arches only, leaving a gap in the central section where decorations could hang later.

Trunk Mounting. Here's an opportunity to add an personal message. After rounding the corners of the truck, I attached it to the vehicle body using a hinge of copy paper. As well as working as a hinge, it provides a writing surface for a little handwritten message.


Trunk Handle. I drew out a number of identical rounded rectangles and adhered them on top of each other to form a handle. The original uses a brad, but I didn't have one in the correct colour, so make the handle instead.

Number/Licence Plate. This is the perfect place to add the names of the bride and groom. I printed mine on copy paper and trimmed it to fit. Here are the colour settings that matched my bronze card. I drew and cut an offset in bronze cardstock to make the plate stand out from the vehicle.


Rear Lights. I wasn't sure whether to cut the lights from red or bronze card. Once I'd got rid of the red writing in the rear window, it was apparent that the red lights would have to go too!

Bumper Decorations. All manner of items can be hung from the bumper, tin cans being the most traditional in the UK. Here is an inspiration photo from a lovely UK wedding blog - The Wedding of My Dreams.

Photo from The Wedding of My Dreams Blog


I made some mini cans to hang from the fender/bumper. A free SVG cut file is available to download from the link below the picture (for personal use only). I cut the base pieces in black and the plain decorative piece in vellum and linked them with baker's twine.


FREE file download SVG


I hope you like this fun variation. Do let me know if you make use of the free file.


11 Aug 2018

Sewing Project - Sun Glasses Case


Hiya, and YES, ladies and gents, I do use other machines than my Silhouette Cameo. This week I've been driving my old sewing machine, and it's been behaving beautifully. I used it to sew this sun glasses case, finishing off the edges with a little hand sewing.

You'll find the original inspiration for the pattern at A Kailo Chic Life (lots of other fun crafting projects too),  and info on making a pattern with the Silhouette here. I used fabric I'd printed edge-to-edge using the Silhouette Designer software, and you can find details about how to do that here.


Materials Required:
Printer Paper & Printer (optional)
Patterned Fabric (at least 8.5", 21.5cm square). I used Silhouette Printable Cotton.
Plain Fabric, same size as above,
Thermolam Batting & Bondaweb, or Fusible Fleece, twice the size,
Sewing Machine
Multi-purpose Thread
Pins, or Wonder Clips
Embroidery Thread & Needle
Scissors.


1. Prepare your paper pattern (printed instructions here or hand-drawn here).


2. Cut one patterned cotton, one plain cotton, one from Bondaweb, and two from Thermolam. Fuse the Thermolam to the reverse of the cotton fabric circles. Note: the Silhouette Printable Cotton already has a light hold fusible backing. Transfer the markings to the plain fabric only.


3. Pin the fused cotton pieces with right sides together. The two reversed clips (red side up) show where the gap in machine sewing should be.


4. Sew around the piece 1/4" from the edge, remembering to leave the gap, and starting and finishing with a few reverse stitches to secure the ends.


5. Trim the corners and snip the curves.


6. Turn the piece inside out.


7. This seems difficult at first, but take it slowly and eventually (and somewhat alarmingly) it will look like this!


8. With a little easing, and the help of a pointed item (like a knitting needle) push out the corners.


9. Press the piece if necessary, shaping the open section. Hand stitch the opening closed, with the raw edges to the inside.


10. Fold over the piece (pasty, or taco style) and pin.


11. Oversew the edges with three strands of embroidery thread using neat, evenly spaced stitches.


12. That's it - the glasses case is complete.


It's perfect to slip into your handbag or swimming bag, keeping you glasses pretty as well as nicely
protected.

Here are the links again for those related posts:

Print edge-to-edge on fabric (or any printable media)

Design a printable pattern in Silhouette Studio software


4 Aug 2018

Make this Dandelion Printable from Sarah Hurley's cut file


Transform the Make A Wish dandelion cut file by Sarah Hurley into a glittery printable using Silhouette Printable Sticker Paper. Tutorial by Janet Packer, aka Crafting Quine http://craftingquine.blogspot.co.uk #MakeAWish #Silhouettefile #SilhouetteStudio #Silhouette #dandelioncutfile #dandelionprintable #dandelion #tutorials #glitterpaper

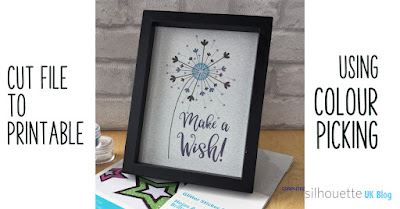
Hiya.  Over on the Silhouette UK Blog this week I have a tutorial showing how to produce a printable using this lovely free dandelion design cut file by Sarah Hurley. Sarah is a British designer, so its always exciting to see her new designs in the Silhouette Design Store.


The project uses this week's featured product - Silhouette Printable Glitter Sticker Paper. It has a fabulous glittery finish and is fantastic for printables. My post has step-by-step instructions for how to transform the cut file into a printable design using the Silhouette Studio software.

Transform the Make A Wish dandelion cut file by Sarah Hurley into a glittery printable using Silhouette Printable Sticker Paper. Tutorial by Janet Packer, aka Crafting Quine http://craftingquine.blogspot.co.uk #MakeAWish #Silhouettefile #SilhouetteStudio #Silhouette #dandelioncutfile #dandelionprintable #dandelion #tutorials #glitterpaper


It includes how to do the following:

  • Arrange the file pieces for printing
  • Make a colour swatch
  • Colour the file using the "Colour Picking' technique
  • Refine the colours for this special media
  • Prepare the print.


Transform the Make A Wish dandelion cut file by Sarah Hurley into a glittery printable using Silhouette Printable Sticker Paper. Tutorial by Janet Packer, aka Crafting Quine http://craftingquine.blogspot.co.uk #MakeAWish #Silhouettefile #SilhouetteStudio #Silhouette #dandelioncutfile #dandelionprintable #dandelion #tutorials #glitterpaper


The Make a Wish file was free in the Silhouette Design Store at the time of writing this post.  I can't promise that it will still be free by the time you read this, but let's hope so. P.S. You don't need a Silhouette machine to make this - just the software, which is free to download here.


The last time I used the Glitter Sheets was to make these. I still regret that we had to use them (would rather have kept them for other years).