31 Jan 2018

Heart Lock Box by Simply Crafty SVGs


Heart Padlock Box made by Janet Packer (Crafting Quine) using the Heart Lock Box from Simply Crafty SVGs.


Hello.  Janet here with a lovely gift box to give for Valentine's Day. I've used the SVG file for the Heart Lock Box from Simply Crafty SVGs with just a tiny bit of extra embellishment and the tiniest bit of manipulation, to make it my own. 

This heart-shaped padlock box is a delight to make. Heart boxes can be a bit tricky to put together with umpteen tiny tabs to glue simultaneously, but this box is cleverly designed with the minimum of tabs to make construction straightforward.

I used the Silhouette Cameo and the Silhouette Studio software, but the file can be made with most cutting machines and software that can use SVG files. Check the FAQs for additional information.


Materials Used:
Pink AC Cardstock
Silver Mirror Card
Silver Glitter Card
Silver Glitter Ribbon
Beacon 3-in-1 Adhesive
Silhouette Cameo


Files Used:
Simply Crafty SVGs Heart Lock Box

Other Digital Files: 
Screw Head Embellishments by Jamie Cripps (Studio or SVG)


Heart Padlock Box made by Janet Packer (Crafting Quine) using the Heart Lock Box from Simply Crafty SVGs.


BOX ASSEMBLY

The box part is constructed from pink cardstock. It's hard to see here because I added an additional front panel in silver glitter card to cover the lid entirely.


DECORATIVE HANDLE/SHACKLE

The handle was made as directed in the accompanying PDF instructions. It is essentially a 3-part sandwich with glitter card as the filling, surrounded by layers of silver mirror card. the cutouts give an engraved look.


DECORATIVE FRONT PANEL

Heart Padlock Box made by Janet Packer (Crafting Quine) using the Heart Lock Box from Simply Crafty SVGs.


I added some additional decorative cutouts to the large front panel. The were 'borrowed' from the shackle by releasing the compound path on the shackle and copying them to  the lock panel. Additional impressed lines were added by hand using the tool shown in the key section (below).

The circular part had an additional piece added to the centre, allowing the edges of the original (in glitter) to show. It was made by releasing the path on the original, copying it, and then releasing it's compound path. Then the size of the outer circle was decreased whilst keeping the keyhole in its original size and position. In short, a smaller circle, but with the same size keyhole.

The only 'non-standard' parts added were the screw heads, cut from silver mirror cardstock.


DECORATIVE KEY

Heart Padlock Box made by Janet Packer (Crafting Quine) using the Heart Lock Box from Simply Crafty SVGs.


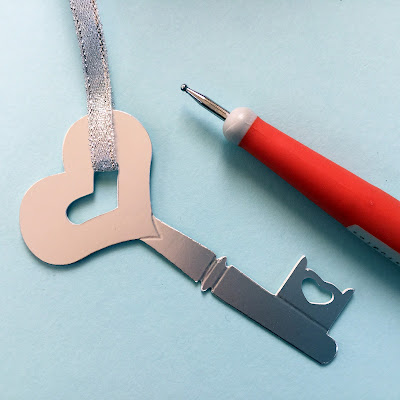
Two copies of the key were cut so that they could be adhered back-to-back.  I used the tool shown to impress some lines into the cardstock. The mirror cardstock is quite soft and required little effort to make quite deep marks.


Heart Padlock Box made by Janet Packer (Crafting Quine) using the Heart Lock Box from Simply Crafty SVGs.


Finally the key was attached with a silver ribbon and the project was complete.


Heart Padlock Box made by Janet Packer (Crafting Quine) using the Heart Lock Box from Simply Crafty SVGs.


The file is newly available in the Simply Crafty SVG Store.  It is a lovely container for any small Valentine's gift - jewelry, favorite chocolates, or JEWELRY (maybe my husband is listening)!


Bye for now,
Janet, DT Member, Simply Crafty SVGs


Blog: Crafting Quine 
Instagram: @CraftingQuine


Simply Crafty SVG Files:
Heart Lock Box


20 Jan 2018

Polar Bear Luminary with Silhouette Glitter Sheets

Polar Bear Luminary made with Silhouette Printable Sticker Paper by Janet Packer for the Silhouette UK Blog and Janet's Crafting Quine Blog . Designs by Nic Squirrell and Sarah Hurley from the Silhouette Design Store.

Hiya, I have new post over on the Silhouette UK Blog today using Silhouette's new printable media – printable glitter sticker paper. Today's project cuts the sheets to make a cute piece of home using the Polar Bears Papercut Lantern file by Nic Squirrell to make a fun wintry, seasonal luminary.

Polar Bear Luminary made with Silhouette Printable Sticker Paper by Janet Packer for the Silhouette UK Blog and Janet's Crafting Quine Blog . Designs by Nic Squirrell and Sarah Hurley from the Silhouette Design Store.


The lantern is made in three layers. An exterior layer of adhesive glitter paper featuring the polar bear design that is layered over a vellum layer printed with a night sky (Constellation Background by Sarah Hurley also from the Silhouette Design Store). Between the two is an acetate layer to which the polar bears are adhered and which gives shape, rigidity, and shine to the lantern.

Polar Bear Luminary made with Silhouette Printable Sticker Paper by Janet Packer for the Silhouette UK Blog and Janet's Crafting Quine Blog . Designs by Nic Squirrell and Sarah Hurley from the Silhouette Design Store.


The post includes details on how to re-size the design to fit an LED candle as well as how to cut the materials and assemble the luminary.

Polar Bear Luminary made with Silhouette Printable Sticker Paper by Janet Packer for the Silhouette UK Blog and Janet's Crafting Quine Blog . Designs by Nic Squirrell and Sarah Hurley from the Silhouette Design Store.


The polar bear design could be changed out for other images - penguins, swans, even fairies would look great.

I do hope you'll try the glitter sticker sheets for cut projects too. 


15 Jan 2018

Little Wooden Boxes made with Wood Effect Vinyl

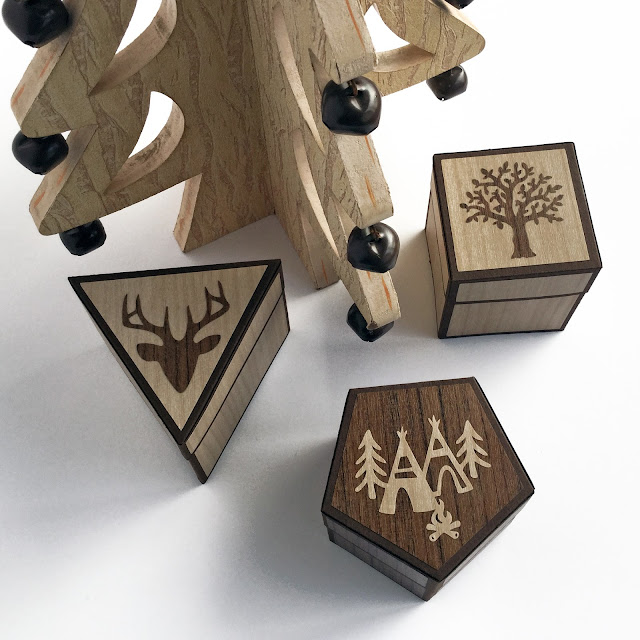
Rustic wood effect gift boxes made with Silhouette Wood Effect Vinyl. Designer Janet Packer (Crafting Quine) for Silhouette UK. Polygon boxes by Lori Whitlock.


Hiya, I have new post over on the Silhouette UK Blog today using Silhouette's new Wood Effect Vinyl. Today's project uses this new product to decorate some of Lori Whitlock's new Polygon boxes.


Rustic wood effect gift boxes made with Silhouette Wood Effect Vinyl. Designer Janet Packer (Crafting Quine) for Silhouette UK. Polygon boxes by Lori Whitlock.


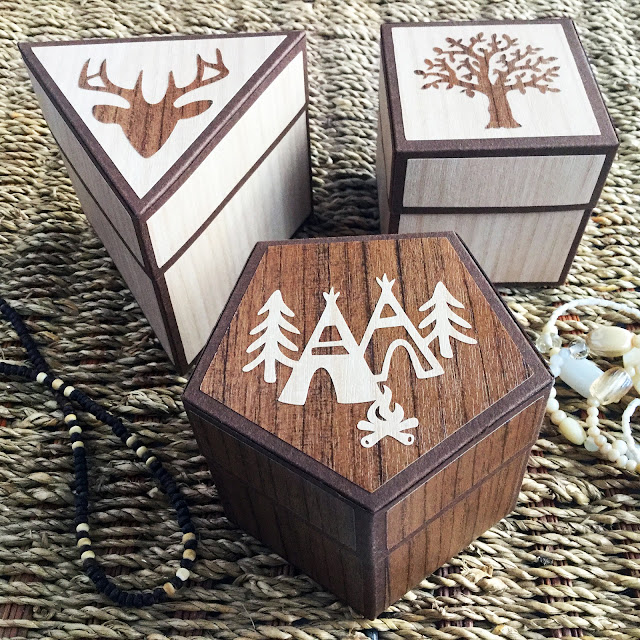
These boxes are made in dark brown cardstock and decorated with panels cut from wood effect vinyl in maple and walnut. Additional images in contrasting vinyl are applied on top (stag, tree, camp).


Rustic wood effect gift boxes made with Silhouette Wood Effect Vinyl. Designer Janet Packer (Crafting Quine) for Silhouette UK. Polygon boxes by Lori Whitlock.


The boxes would make great little gift boxes for rustic jewellery and small crafts, but larger versions would be pretty enough to be displayed in their own right.


Rustic wood effect gift boxes made with Silhouette Wood Effect Vinyl. Designer Janet Packer (Crafting Quine) for Silhouette UK. Polygon boxes by Lori Whitlock.


You can get great results by adding vinyl to cardboard. The wood effect vinyl gives a great wood look finish, and intricate decorative designs are easier to cut from vinyl than from cardstock. I hope you'll try it.

Rustic wood effect gift boxes made with Silhouette Wood Effect Vinyl. Designer Janet Packer (Crafting Quine) for Silhouette UK. Polygon boxes by Lori Whitlock.


My post on the Silhouette UK Blog gives details of the product, how to cut it, and how to apply it to the cardstock boxes.

13 Jan 2018

Monkey Puzzle Card with Valentine Monkey from Sanqunetti design


Monkey Puzzle Card by janet Packer (Craftingquine.blogspot.co.uk), subtracting a puzzle piece from the card blank. SVG designs by Lori Whitlock and Sanqunetti Design.

There are several new SVG cutting file release this week from Sanqunetti Design.  I picked this cheeky Valentine Monkey SVG file.


Card Base

Initially I made the 6" x 6" card base adding the Square Puzzle by Lori Whitlock from the Silhouette Design Store. This file splits into all the individual puzzle pieces and I cut two sets of puzzles, one in red and one in duck egg cardstock with my Silhouette Cameo. I then subtracted one piece from the top right of the card base before mounting the coloured pieces using the colours alternately.  


The Monkey

I made the monkey up into a card topper omitting the heart. All the remaining pieces were cut from coloured cardstock except the whites in the monkey's eyes which were drawn in with a white gel pen.  I took a copy of the cut away puzzle piece and shrank it, subtracting the shape of the monkey's paw.  This was cut from red cardstock and added to the monkey with a dimensional foam pad.


I love changing up files like this.  The monkey could hold any small item and be used for all kinds of occasions - not just for Valentine's.


This card has been entered in the following Challenges:

Papercraft Business Challenge #2

10 Jan 2018

Handy Storage Solution with the Curvy Drawer Organizer from Simply Crafty SVGs


Hello.  Janet here with a project to help with organising your craft desk or computer area. I've used the SVG file for the Curvy 3-Drawer Organizer to make a practical computer tidy.  It is one of a range of practical curvy organisation cutting files from Simply Crafty SVGs.

Now, I should explain that initially I hadn't intended to stop at just one set of drawers. The curvy range would look great stacked up using the different drawer configurations, and I'd planned an organisation stack to sit beside my computer too (this one fits neatly under the screen - great for storing all my USB memory sticks. However, mid-way in I discovered that I only had a couple of sheets of my favourite heavy weight grey cardstock! I will have to order some more and build the stack later in the year.


This file is a delight to make. The construction is really strong, and cleverly designed to cover up all the tabs and glued parts, for a truly neat finish. It warranted a neat and precise decoration, and I'll show you how I finagled this with 6x6 patterned paper.

This was made using the Silhouette Studio Designer Edition software, but can be replicated in other cutting software.


Materials Used:
Grey heavyweight Cardstock
(I used Slate Grey Smooth Card 240gsm from UK supplier, Papermill Direct)
6x6 Patterned Paper (MME A Happy Heart, discontinued)
Beads (for feet)
Beacon 3 in 1 Adhesive
Silhouette Cameo


Files Used:
Simply Crafty SVGs Curvy 3-Drawer Organizer

Other Digital Files: 
Leaf and Flower Border Set by Nic Squirrell (Studio or SVG)
Garden flower by Technique Tuesday (Studio or SVG)


DRAWER ASSEMBLY

The SVG file for the Drawer set includes clear step-by-step instructions in PDF format, so I won't cover that here. I made the whole design slightly bigger so that my rings of USBs would fit easily. My only other deviation was to adhere the decorative panels after I'd assembled the drawers, as I wasn't certain if my initial choice of paper would work (it didn't, as the pattern scale was too big, so I ended up using paper from a 6x6 pad on a project that was slightly too big for it).


DECORATIVE PANELS

The scale of my original pattern was too big, so chose I to use some 6x6 paper, but I only had a sheet and a half. I had to use some careful planning and precise alignment of the paper on the cutting mat (the I only just managed to fit the pieces on) to make the patterns match.


The large piece had to be rotated by 45º to fit on to the paper.


For the smaller pieces I drew a square to represent the 6x6 paper then used the Align tools from the Transform to panel to ensure that they were centred, level and evenly spaced horizontally.  The spaces between the shapes were closer than I'd normally like, but by reducing the cutting force the pieces cut without mishap. NOTE: One of the drawer panels is smaller than the others. I rearranged their order so that the small one sat in the middle, as it would on the finished item, so the pattern would align correctly.


DECORATIVE ELEMENTS

I made an offset of the leaf border and flower together and had to cut the border in two pieces because I had so little of the paper left (the grey stripe was on the reverse of the plaid pattern used for the panels). By releasing the compound path on the flower I was able to select and cut the flower centre from the cream stripe too.


Once the elements were assembled, I adhered the whole piece to the top of the drawers.


DRAWER FEET

I thought the set would look more finished with a set of feet. I used the beads from some broken necklaces and had the choice of two types: disk-shaped, or spherical ones.


It looked nice with the spherical ones, but I realised that the foot of my monitor stand was sloped, so I opted for one pair of the disc-shaped ones at the front, so that the drawers would sit flat when they were positioned on the foot.


Here is the completed project in position. Love it!


I can't wait for my cardstock delivery so that I can make a matching storage stack.


All the files are here. Oh, and there is also a Magazine Style box; a row of these would be great for all my USB cables (why does every camera seem to need a different style of USB)?

I hope you find these files and tips useful in organising your desk or craft room. I love starting the New Year with a tidy desk!


Bye for now,
Janet, DT Member Simply Crafty SVGs


Blog: Crafting Quine 
Instagram: @CraftingQuine


Simply Crafty SVG Files:
Curvy 3-Drawer Organizer

7 Jan 2018

Flip Top Calendar using Silhouette Studio's Move tool

LINK to TUTORIAL : Flip Top Calendar designed by Janet Packer (CraftingQuine) for the Silhouette UK Blog using IKEA Tolsby picture frame.

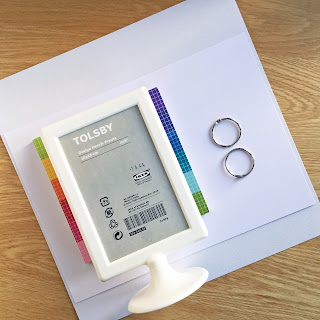
Hello and Happy New Year.  I had a post on the Silhouette UK Blog a few days ago showing how to make this flip top calendar. It used Silhouette's Print & Cut and Move functions.  It was cheap to make (the frame I used cost just £1 from IKEA), and would look great on a desk, beside a telephone, or even as a small gift.

I used the 2018 Calendar set by Alaa' K (parts 1, 2, 3, 4), resizing them to fit a bought picture frame. I also adjusted the position of the holes using the Move function.

The bright coloured papers are from MFT Graphic Grid 6x6 paper pad. There are twelve different colours - perfect for this project!


LINK to TUTORIAL : Flip Top Calendar designed by Janet Packer (CraftingQuine) for the Silhouette UK Blog using IKEA Tolsby picture frame.


LINK to TUTORIAL : Flip Top Calendar designed by Janet Packer (CraftingQuine) for the Silhouette UK Blog using IKEA Tolsby picture frame.


Hope you have a happy and organised 2018!