29 May 2017

A Mouse Ice cream Cart and Hints on Using Scraps


Hiya, Over to the Silhouette UK Blog today I have a post all about using scraps, making your media go further, and using substitutes if you don't seem to have just what you need. To illustrate these tips I made this cute little Mouse Ice Cream Cart by Samantha Walker.


Here are some close-up pics of my favourite tweaks.


Cork ice-cream cones


A tiny silver tray in the cool box (great for a secret message).


A birthday message on the custom chalkboard


I hope like this fun little project and that the post gives you some ideas for using up your bits and pieces.


If you have tips of your own I'd love to hear about them in the comments. Do share!


19 May 2017

Chalkboard Labels for Homemade Preserves


Hiya,

I don't have a big garden, but I love growing things to eat. Rhubarb grows a little too successfully, and its big leaves shade the lawn, causing it to die off if we don't pick it regularly. To use up an extra large harvest, I recently made a hot and spicy chutney with our rhubarb and shop-bought fresh root ginger.  I wanted to 'prettyfy' the jars to give some as gifts. and made custom chalkboard labels.


Over on the  Silhouette UK Blog today I show how I made the labels with my Silhouette® CAMEO 3, Chalkboard Cardstock and a favourite gel pen in the Silhouette Pen Holder. I used a few of these lovely circular frames designed by Lori Whitlock and a Sketch font called Sisters, designed by Riva Wilkins. I used a white gel pen to draw the frames and write the labels, a draw and cut technique.


I also added some tiny mini labels just for fun and some black and white baker's twine to finish.

Do you make preserves?  If not, these labels would look equally pretty on store-bought preserves. Why not pop over to the blog and see how it's done?


11 May 2017

Make Your Own Cork Stickers


Hiya,  I've a new post over on the Silhouette UK Blog today.  I've been working with adhesive cork sheets a lot recently.  I haven't shared all my projects yet because some of them are for future publication, but I will share when I can.

Last month I wrote in general about how to use the cork sheets. I used the cork sheets to cover MDF shapes, and the designs I cut were quite large. As promised I've returned to the Silhouette Cork Sheets to make sticker embellishments for my cards.

I've discovered that you can paint and stencil onto cork. I've painted through a stencil with acrylic paint and with pigment ink.  The pigment ink gave the neater effect, but not all colours worked equally well.  I like the look I achieved with one of the Tim Holtz Distress Oxides. This was using Broken China. The results were quite crisp with just a cardboard stencil.


However, I like the neater and more detailed results achievable using Silhouette Heat Transfer Material. This involves pressing heat transfer vinyl onto the cork sheets with an iron or heat press.

Here are some beach huts I designed in the Silhouette Studio software. Better still, the adhesive backing on the cork stays sticky, so are easy to apply to projects - no additional adhesive required. I did find it a little time consuming to apply the vinyl colours to one cork piece at a time though and looked for a better way to decorate a whole sheet of stickers at once.


For my Silhouette post I made a selection of sweet themed stickers using some of the simpler elements from designs purchased from the Silhouette Design Store:
  • Gingerbread Peppermint & Candy Cane by Kristen Magee #35782
  • Valentine Choc Rack Tall Card by Snapdragon Snippets #73620
  • Filofax Planner Donut Bookmark Clip by PPbN Designs #76883  


The post tells you how I made and cut the cork stickers and then decorated them with two layers of HTV one whole sheet of stickers at a time. Yes, with this method I decorated 15 stickers in just two pressings - a huge time-saving!

It also gives cut settings for both Cameo and Curio, and details on how to press the designs.

To use the stickers, its simply a matter of peeling off the backing paper. They can be used on cards, scrap layouts and other papercrafting projects.  I made a few into planner clips. The cork sticks really well when a pair are used back-to-back, securing the clip in between.


I hope you'll experiment too. I'd love to know how you get on and what you make. You could share pics on my NEW Facebook page Janet Packer CraftingQuine.


7 May 2017

Stained Glass Butterfly Card


Stained Glass Butterfly Card by Janet Packer (CraftingQuine.blogspot.co.uk)

Hello, I've been wanting to make one of these stained glass cards for a while. This one is made from black card and pearlescent vellum coloured with alcohol ink.


Stained Glass Butterfly Card by Janet Packer (CraftingQuine.blogspot.co.uk)


The card base was cut from heavy-weight cardstock on my Silhouette Cameo, and then 2 further frames cut from adhesive cardstock. Once the vellum (coloured with two colours of alcohol ink) was dry, I stuck one of the frames on to it, and trimmed around it, sandwiched the vellum with the other frame then mounted the whole butterfly onto the card base.

I made a separate body in the Silhouette software, cut two, and adhered them on on top with the top most one decorated with glitter flock.

The sentiment is a stamp from Lawn Fawn and was stamped in blue Distress Oxide ink and heat embossed with clear embossing powder.

Items Used:
Butterfly Card cut file by StudioIlustrado
Silhouette® Cameo 3
Pearlescent Vellum
Adirondack Alcohol Ink in Aqua
Adirondack Alcohol Ink in Sailboat Blue
Black Heavyweight Cardstock
Black Adhesive Cardstock
Glitter Flock Powder
Lawn Fawn Scripty Sayings
Distress Oxide Ink in Broken China  


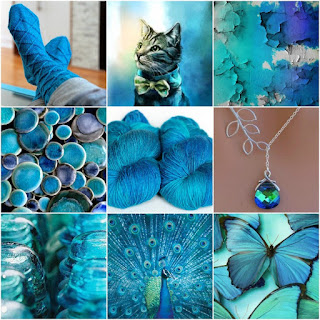
The colours and butterfly subject inspiration came straight form the images the Daring Cardmakers May Elemental Challenge. The third element was the texture of the fluffy, kitten on the butterfly's body.

Daring Cardmakers have such great challenges!


1 May 2017

Shaker Maze Card


Hiya,
I recently made a birthday card for a friend who is an a-MAZE-ing baker, and today I've shared it over on the Silhouette UK Blog. Its one of my favourite shaker cards, this time with a maze incorporated.


I used the Heart Maze file by Tanya Batrak because it has an open space in the centre for a more detailed decorative element. I enlarged the space and built up the layers so that the beads could move around the maze. I also added indentations to the central picture for the beads to rest, turning the card into a little game.

These are the files I used for the Silhouette Design Store:

Heart Maze file by Tanya Batrak (#172861)

Cupcake file by PattyYoung Designs (#34751)

Yellow Daisy font by Rivka Wilkins (#106927)

Over on the blog I've included a tutorial on how to put this card together. Its not a quick make, but has a truly fun result. I speeded up the whole process by cutting the pieces from adhesive card stock.

You might like the other Shaker card tutorials I have over on the Silhouette UK Blog:
Making Shaker Cards - Pt 1 The Basics
Making Shaker Cards Pt 2 The Cards, and
Anchored Shaker Elements.

I hope my friend enjoys her birthday card.