28 Jul 2018

Giant Pinwheels from 12-inch square paper


Hiya. Today I have a fabulous giant pinwheel project over on the Silhouette UK Blog. I used bright and lovely papers from the All Occasions paper pad from GraphtecGB. The papers are double-sided, so perfect for making windmills (or pinwheels, as our friends across the Atlantic call them). They are 180 gsm too, so a great weight for sturdier paper crafting projects. The file, the 3D Double Pinwheel, is designed by Lori Whitlock (#81178), and is available from the Silhouette Design Store.


The post over on the Silhouette UK Blog includes hints and tips on:

  • Cutting the file
  • Assembling the pinwheel
  • Making the stick
  • Adding additional decorations


The finished pinwheel would make a great decoration for a party room, or for an the garden for an outdoor party. Do pop over to the Silhouette UK Blog if you'd like to find out more.


20 Jul 2018

Baby Door Hanger with an Acrylic Blank and Metallic Vinyl


Hiya,  I have a new post over on the Silhouette UK Blog today. It features a quick and easy gift idea using this week's featured product for the Silhouette UK Design Team  - Silhouette Metallic Vinyl. I've applied the vinyl to a blank acrylic shape and added a pretty ribbon.


I had a bit of a time restrain on this project as it was a gift needed at very short notice. I needed it to come together quickly, but unfortunately I made a rookie error which required a recut. That lead to a design revision which I think improved the look of the finished item. Pop over to the blog to read how I did it.

I used the following files from the Silhouette Design Store:

  • Baby Sleeping Door Hanger file by Ginny Nelson (#28287)
  • Stars file by Rhonna Farrer (#181213)

The 10 cm blank acrylic star came from Acrylic Craft, and the ribbon was purchased at my local craft shop Meg's Attic. The teal metallic vinyl is Silhouette Metallic Permanent Vinyl and was provided by GraphtecGB as part of my Silhouette Design Team package.


18 Jul 2018

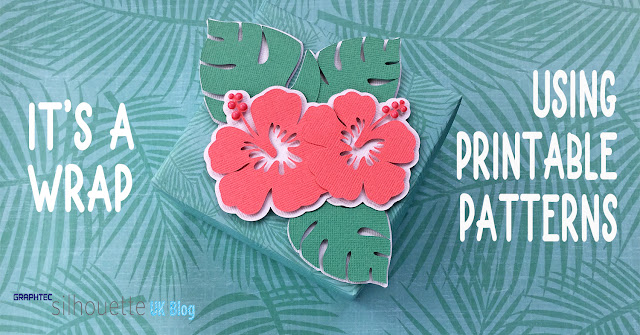
Printing Wrapping Paper with Silhouette Studio using the FREE file of the Week

Make gift wrap with the FREE Tropical Leaves file on your Silhouette. Tutorial by Janet Packer Crafting Quine http://craftingquine.blogspot.co.uk for GraphtecGB Silhouette UK.


Hello, over on the Silhouette UK Blog today I have a tutorial showing how to print the Free Tropical Leaf Pattern file to make custom gift wrap. Do pop over there if you'd like to see how it's done. To make the paper, you don't need to have a Silhouette, just access to the Silhouette Studio software which a free download from here.

Make gift wrap with the FREE Tropical Leaves file on your Silhouette. Tutorial by Janet Packer Crafting Quine http://craftingquine.blogspot.co.uk for GraphtecGB Silhouette UK.


If you haven't printed your own wrapping paper before I urge you to to try it out. I don't think I've bought a card since I bought my first Silhouette Cameo 6 years ago; now I may not need to buy wrapping paper either!

The Tropical Leaves Pattern (#269750) is available for free until the 23/07/2108, after that it will revert to the regular price.


13 Jul 2018

Magnetic Bookmarks and Planner Page Markers

Print & Cut Magnetic Bookmarks Tutorial by Janet Packer https://craftingquine.blogspot.co.uk using Silhouette printable Magnet Sheets. #Bookmark #magnetic #printable #Silhouette


Hiya, Over of the Silhouette UK Blog today I've shared a tutorial for some cute retro bookmarks using the Silhouette Printable Magnetic Paper. These use a Print & Cut design called the 57 T Bird Car Print and Cut Set (#12253) by Samantha Walker.


Print & Cut Magnetic Bookmarks Tutorial by Janet Packer https://craftingquine.blogspot.co.uk using Silhouette printable Magnet Sheets. #Bookmark #magnetic #printable #Silhouette


The post includes details on how to adapt the design to print onto the magnetic sheets with an inkjet printer, and how to use a Silhouette Cameo to cutout and score the bookmarks too. Pop over to the Silhouette UK Blog to find out more.

Here are some other projects I have made using these printable magnetic sheets.


Magnetic Paper Dolls
Giant Magnetic Paper Clips

11 Jul 2018

Combining Files to make a Fun Drinks Wagon

Fun 3D Drinks Wagon in paper and card make for Simply Crafty SVGs by Janet Packer (Crafting Quine) https.craftingquine.blogspot.com . Uses  Little Wagon, Tent Camping Box, and Beer Bottle Card


Hiya.  Today I have a hybrid project using some great files from Simply Crafty SVGs to make a playful 3D project. The weather here in Scotland is breaking records for high temperatures and rain-free days! At times like these, BBQs are dusted off and outdoor parties are the order of the day. This project would make a fun table centre for such occasions.


Little Waggon


Fun 3D Drinks Wagon in paper and card make for Simply Crafty SVGs by Janet Packer (Crafting Quine) https.craftingquine.blogspot.com . Uses  Little Wagon, Tent Camping Box, and Beer Bottle Card


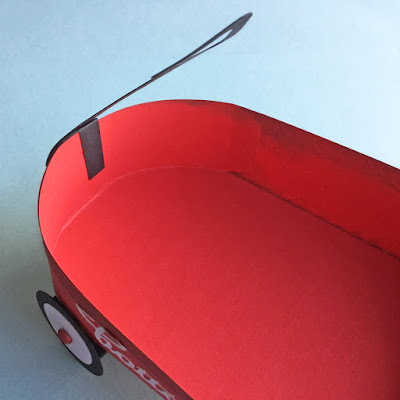
I cut and assembled the Little Wagon SVG file with minimal alteration, just increasing the size a little and adding some custom lettering.

As I would be adding extra weight to the finished wagon, I added some extra bracing pieces behind the wheels. This was achieved by simply folding a strip of cardstock into a rectangle, and adhering it between each set of wheels. The braces are barely visible when the wagon is upright.

Fun 3D Drinks Wagon in paper and card make for Simply Crafty SVGs by Janet Packer (Crafting Quine) https.craftingquine.blogspot.com . Uses  Little Wagon, Tent Camping Box, and Beer Bottle Card


I also decided to secure the pull handle in position by adding a little piece of folded card, stuck to both the handle and the waggon front.

Fun 3D Drinks Wagon in paper and card make for Simply Crafty SVGs by Janet Packer (Crafting Quine) https.craftingquine.blogspot.com . Uses  Little Wagon, Tent Camping Box, and Beer Bottle Card


Wooden Chest


Fun 3D Drinks Wagon in paper and card make for Simply Crafty SVGs by Janet Packer (Crafting Quine) https.craftingquine.blogspot.com . Uses  Little Wagon, Tent Camping Box, and Beer Bottle Card


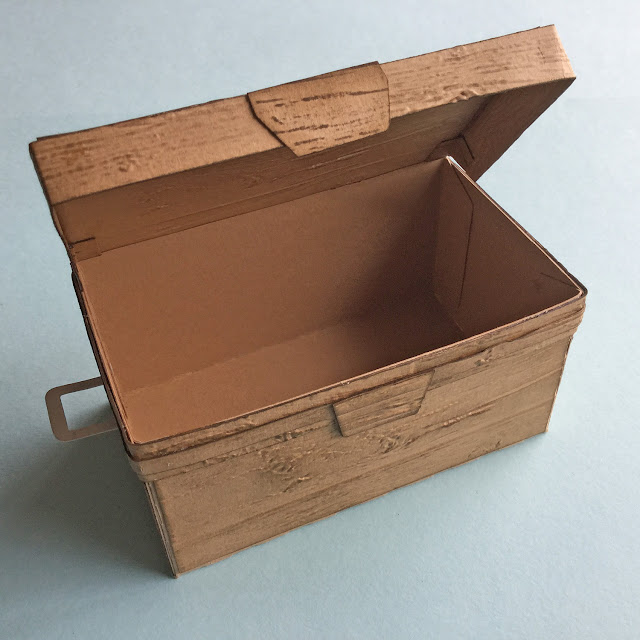
The wooden chest is adapted from the cooler from the Tent Camping Box file. I initially made it in blue so it looked like my large plastic cooler, but I decided that a more vintage look was required, so endeavoured to make it look like a rustic chest.

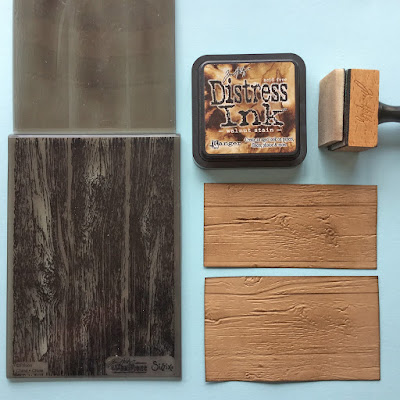
It was the perfect opportunity to try out my new embossing folder (a 3D Texture Fades Embossing Folder by Tim Holtz called Lumber). The texture was enhanced by applying Walnut Stain Distress Ink to the edges and the top surface of the panels I made (details to follow).

Fun 3D Drinks Wagon in paper and card make for Simply Crafty SVGs by Janet Packer (Crafting Quine) https.craftingquine.blogspot.com . Uses  Little Wagon, Tent Camping Box, and Beer Bottle Card


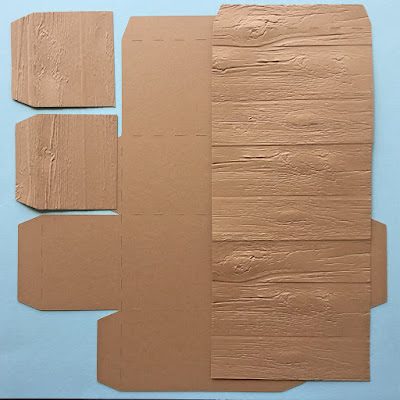
The chest was scaled up in size to suit the wagon. I cut the chest from kraft cardstock, and then cut a duplicate to cut up for panels (just using scissors). By cutting off the chest sides I was able to fit the pieces through my embossing machine.

Fun 3D Drinks Wagon in paper and card make for Simply Crafty SVGs by Janet Packer (Crafting Quine) https.craftingquine.blogspot.com . Uses  Little Wagon, Tent Camping Box, and Beer Bottle Card


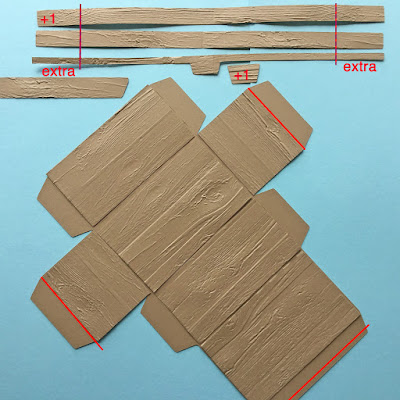
I then cut the individual panels apart, trimming them to be slightly smaller. I also cut an additional strip to make a lip around the chest lid, and also made the long strips longer still, so that they would wrap around three sides of the chest. The panels were then adhered to the base piece and the flaps trimmed as shown below.

Fun 3D Drinks Wagon in paper and card make for Simply Crafty SVGs by Janet Packer (Crafting Quine) https.craftingquine.blogspot.com . Uses  Little Wagon, Tent Camping Box, and Beer Bottle Card


I relocated the piece which sould have been on the bottom of the chest, and stuck it to the inside of the lid instead as it would show more there.

Fun 3D Drinks Wagon in paper and card make for Simply Crafty SVGs by Janet Packer (Crafting Quine) https.craftingquine.blogspot.com . Uses  Little Wagon, Tent Camping Box, and Beer Bottle Card

It was then simply a matter of assembling the chest and attaching the lip with some spare tabs of card (visible in the pic of the complete chest, above). The chest was finished by applying the decorative strips (not necessarily where they were intended to be), and adding handles cut from silver metallic card.


Beer Bottles


Fun 3D Drinks Wagon in paper and card make for Simply Crafty SVGs by Janet Packer (Crafting Quine) https.craftingquine.blogspot.com . Uses  Little Wagon, Tent Camping Box, and Beer Bottle Card


I minimised the inner beer bottle shape from the Beer Bottle Card SVG file together with the cap, the neck label, and two of the front label pieces (there are loads to choose from).  I made a 12" x12" Print & Cut on cream cardstock for the pale parts of the label, adding the phrase "Cheers m' beers" in a font which I then curved to match the shape of the label. Read more about how to do a 12" x 12" Print & Cut here.

Fun 3D Drinks Wagon in paper and card make for Simply Crafty SVGs by Janet Packer (Crafting Quine) https.craftingquine.blogspot.com . Uses  Little Wagon, Tent Camping Box, and Beer Bottle Card


Prior to applying the labels, the bottles (a double thickness), were coated with Nuvo Crystal Glaze on the non-textured side, and left to harden overnight. The effect is very glass-like in real life, but doesn't show well in the photos.

The labels and caps were then adhered, and the bottles were arranged in the chest. I LOVE the bottle cap design that comes with the file - it's a great little detail and looks so realistic cut from metallic card. I added some plastic ice cubes to keep the bottles upright (available from florist suppliers). The chest was then loaded onto the little wagon.

Fun 3D Drinks Wagon in paper and card make for Simply Crafty SVGs by Janet Packer (Crafting Quine) https.craftingquine.blogspot.com . Uses  Little Wagon, Tent Camping Box, and Beer Bottle Card


All three files are available from the Simply Crafty SVGs website and heaps of ideas for using the files on the Simply Crafty SVGs blog.


7 Jul 2018

Custom Cake Toppers


Hiya, Over on the Silhouette UK Blog today I have a set of new Chipboard projects. The Silhouette Chipboard Sheets cut and layer beautifully to make stronger items, and this week I have used them to make a set of co-ordinating cake toppers for a special occasion. The post included details on how to make a dimensional topper for a large cake, a smaller variation for cupcakes, and an economical way of making tabletop confetti.


Materials Used

  • Silhouette Chipboard Sheets
  • Silhouette Glitter Heat Transfer (copper)
  • AC Textured Cardstock
  • Beacon 3-in-1 Craft Adhesive
  • Silhouette Cameo 3
  • Domestic Iron
  • Silcone Sheet

Designs Used

  • Crown Me Phrase by Lori Whitlock (#215545)
  • Princess Wands/Cake Toppers by Lori Whitlock (#63758)
  • Peanut Butter & honey Font by ScrapNFonts (#143690)


The layered chipboard can be decorated with all kinds of media: paint, decorative papers, vinyl, and more. I wanted my toppers to be glittery, but I didn’t want to risk getting glitter on the cakes. The perfect solution was to fuse glitter heat transfer vinyl onto the toppers to give a neat, flake-free finish. I used the Silhouette Glitter Heat Transfer in a rich copper. ... read more (at Silhouette UK Blog)