24 Nov 2018
A Contemporary Mass-Produced Christmas Card
Hi, I can't believe that November is almost over - where did the month go? Every year I make one or two card designs in multiples, and this year I've picked a contemporary card design by Kristen Magee; the Fa La La Christmas Card (#234355). Over on the Silhouette UK Blog I have a tutorial showing how I simplified this seven-layer card to two-layers with a few additional accents using silver Silhouette Sticker Foil.
In the post I take you through the process of how this card evolved to the point at which I felt I'd made it as easy enough to make in quantity. I reduced the number of layers by bringing in the Print & Cut technique as well as introducing some extra shine with foil sticker paper.
I made a heap of these little accent tags too. I love how teeny tiny I can make them with my Silhouette Cameo.
Materials Used
Silhouette Silver Printable Sticker Foil
Medium-weight White Textured Cardstock
Square Card Blanks
Beacon 3-in1 Advanced Craft Adhesive
Silver Cord
Silhouette CAMEO® 3
Silhouette 12" x 12" Cutting Mat
A3+ Printer (if printing on 12"x12", otherwise an A4 Printer)
21 Nov 2018
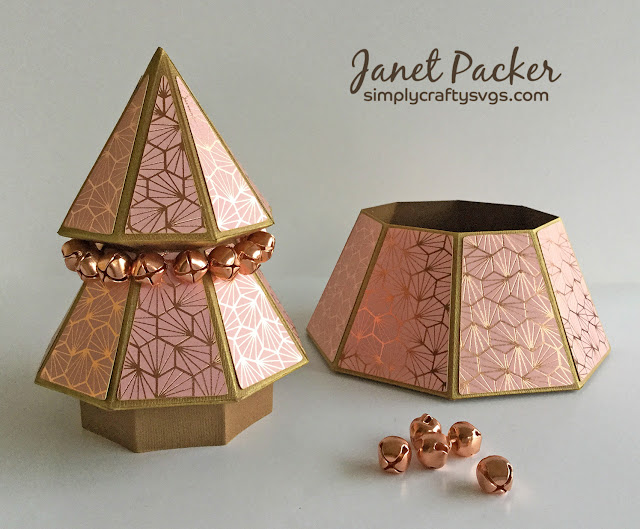
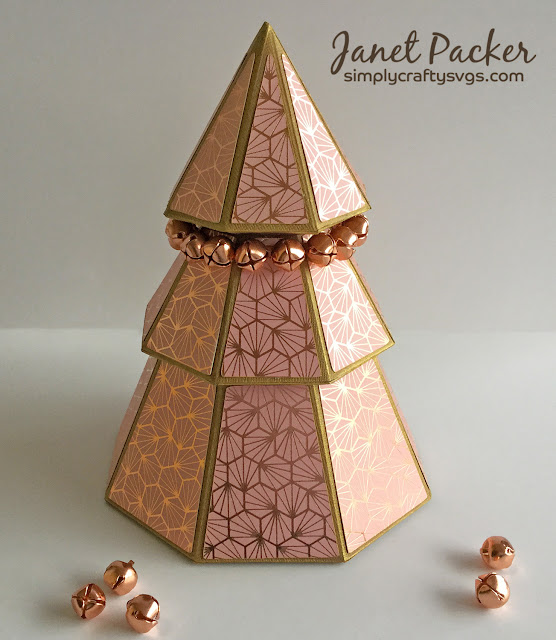
Geometric 3D Christmas Tree Box
Hi there! Today I'm sharing a sophisticated Christmas decoration using a versatile cutting file from Simply Crafty SVGs. I've used the Christmas Tree Box, a 3-dimensional tree that can be used as a special gift box, or simply used as a pretty decoration.
I love metallics, and I love geometric patterns, and when I saw this fabulous decorative paper I couldn't resist trying out an alternative holiday colour scheme of blush pink and rose gold. It's from the DCWV Lively Geos 12" x 12" paper stack. I used a Silhouette Cameo 3, and the Silhouette Studio Designer Edition of the software to cut all the pieces for the box. However, the SVG files can be used with other desktop cutting machines and software (details here).
Materials Used:
Walnut Bazzill Textured Cardstock
Octagon Patterned Paper from DCWV Lively Geo 12 x 12 Stack
Beacon 3-in-1 Adhesive
Galaxy Gold Brilliance Dew Drop Ink Pad
Copper Jingle Bells from Paperchase
Silhouette Cameo or other digital die-cutter
Files Used:
Simply Crafty SVGs Christmas tree Box
Cutting the Pieces
This file is very economical in paper use; I rearranged and rotated the pieces a little and cut all the pieces from two sheets of 12-inch square walnut cardstock and one sheet of 12-inch square patterned paper.
Constructing the Box
Sandy of Simply Crafty SVGs has made a fab assembly video for this box. In order to add gold ink to all the fold lines, I assembled the box before adding the decorative panels.
Decorating the Box
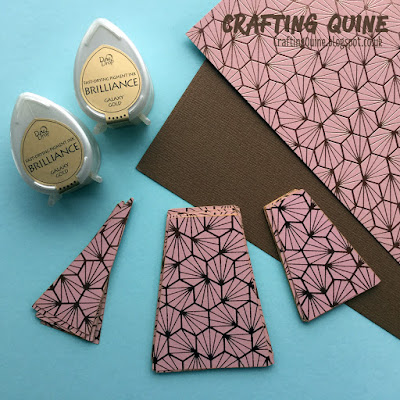
The tear-drop shape of the ink pad makes it easy to apply gold ink to all the folds. This gives the box the appearance of being gold all over once the panels are attached. I loved that my clumsy over-inking would be covered too!
I also inked the edges of the decorative panels to hide the white edges.
I applied the panels a little higher than suggested in the video so that they were centred. They seemed to fit just fine that way.
The box was finished off with a string of copper jungle bells tied around the base of the first tier. With hindsight, I'd have hung them individually from the top tier before I attaching the tiers together. I'll certainly do that next time I make one.
I'm looking forward to adding this to my Christmas decor - sorry friends, this one's staying at home with me!
Janet, DT Member Simply Crafty SVGs
Blog: Crafting Quine
Instagram: @CraftingQuine
Simply Crafty SVG Files:
Christmas Tree Box
11 Nov 2018
Silhouette Chipboard and Two-Step Cutting Technique
Hello, over on the Silhouette UK Blog this week I've been using the Silhouette Chipboard sheets. I did have a little problem preventing the card from moving around my mat while is was cutting it, so I've shared the solution, a two-step cut.
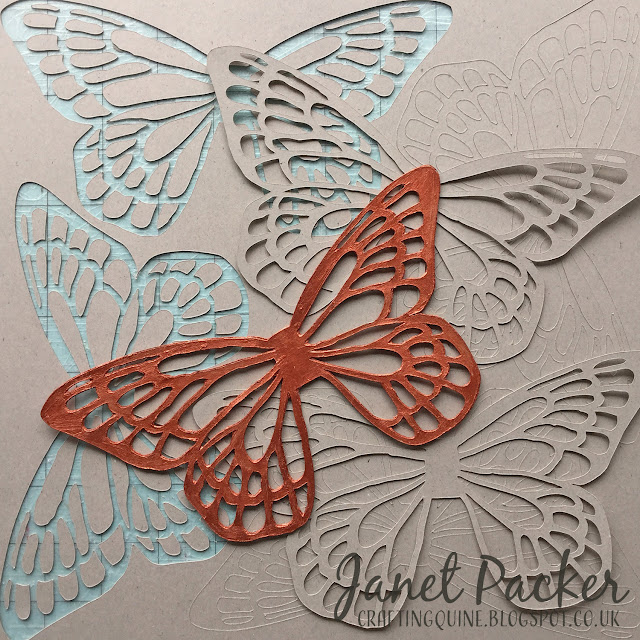
The first cut, cuts about half way through the media, and the second follows the first and cuts all the way through. This allows the pressure on the first cut to be lower so movement of the media is less likely, and the second cut ensures that the surface is cut more cleanly. It works for thicker and more difficult to cut materials, and also coated media such as metallic card and specialist printing cardstock.
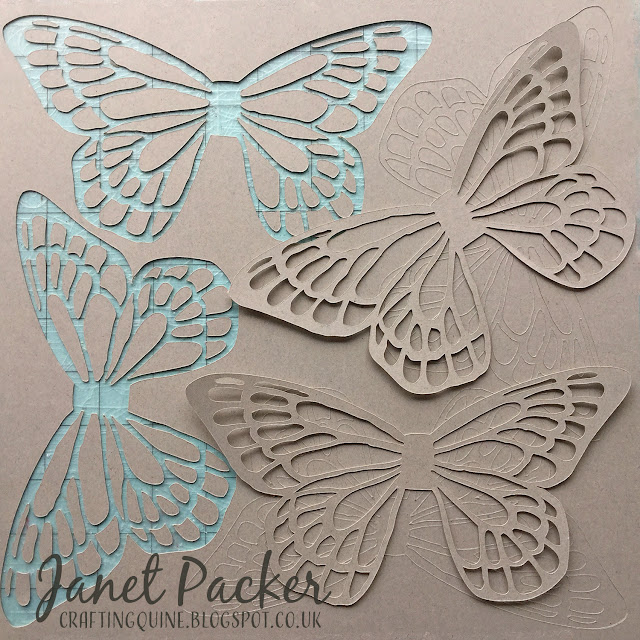
My project is a set of fairy wings (Lori Whitlock's Butterfly) cut from the Silhouette Chipboard, part of a mixed media project yet to completed.
7 Nov 2018
Joy Marquee Letters for Carina Gardner Papercrafts
Hiya! I'm delighted to be a guest designer over on the Carina Gardner Blog again this week. I have a charming Christmas decoration for you, featuring Carina's Marquee Letters J, O, Y, the bow from the Filled Basket of Tulips and the Mini Lou Gold Leaf Wreath.
Here is a list of all the materials I used:
Marquee Letters:
Rose Gold Glitter Wallpaper by Windsor Wallcoverings
Silhouette Chipboard
Vinter Mini Tree Baubles from Ikea (any colour)
Montana Copper Metallic Spray Paint from Hobbycraft
Wreath & Bow:
Centura Pearl Cardstock in Rose, Cream & Metallic Copper
Cast Metallic Vinyl (Oracal 951) in 920 Bronze from Crafty Cutter
DMC Metallic Copper Thread
Nuvo Crystal Glaze
The Mini Lou and Carina Gardner cutting files are all from the Silhouette Design Store . You'll find more details over on the Carina Gardner Blog. You'll also be able to read about the other guest designers of the Carina Gardner Holiday Design Team 2018.
To keep up with all my projects, follow me on Instagram.
All the Holiday Team makes will use the hash tag #cgdesignteam
3 Nov 2018
FREE Papercraft Hanger SVG File to use with the Leaf Wall Art Shadow Boxes
Hello, this week I've been playing with corrugated paper to make these Leaf Wall Art Shadow Boxes. I have a post over on the Silhouette UK Blog describing how to cut the corrugated paper, with instructions on how to put together this set of shadow boxes.
I like to share a little extra something over here on my own blog when I can. This week I have a FREE cutting file for a hanger to mount these shadow boxes, or any light papercraft project, to the wall. The file is in SVG format, so can be used with most digital paper cutting machines; Silhouette (with Designer edition), Cricut, Scan n' Cut, etc. The file is free to use for all non-commercial uses, all I ask in return is that you become a follower of my blog or Instagram feed.
 |
| Download the FREE file here |
Once the hangers are cut out, fold them on the centre score line and adhere the two halves together. Fold on the remaining score line and adhere the square part to the back of your paper craft project.
I constructed the shadow boxes so that there is a void in the back to accommodate a hanger and a hook and still allow the boxes to hang flush to the wall. The boxes can be hung on the wall once the adhesive is dry. Traditional picture hooks will work, and small 'command' hooks will work too. The one pictured is possibly a little too small, but I've run out of my favourite size.
This is the design I used to make the Leaf Shadow Boxes (an SVG file from the Silhouette Design Store).
 |
These are the Silhouette products that I used.
 |  |  |  |
Here are the other products used/recommended.
 |  |  |  |
I'd love to hear how you use this hanger. Do post a comment here, or on my other social media if you find it handy.
Subscribe to:
Comments (Atom)


