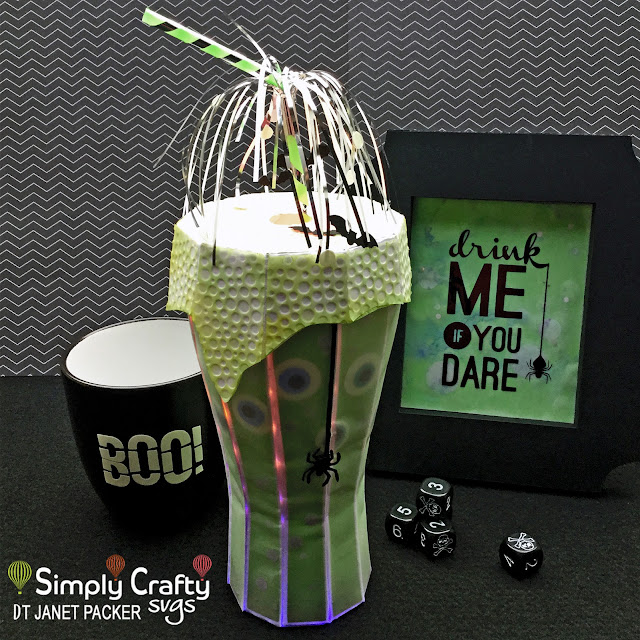
Hello, Janet here with a Halloween project using another amazing cutting file from Simply Crafty SVGs. There are many fantastic Halloween designs in the shop, but I decided that I'd transform the 3D Beer Glass into a gruesome brew luminary, complete with eyeballs, green foam, and led lights. I've included details on how you can make this 'brew' for yourself. I used a Silhouette Cameo® 3, but the SVG files used for the glass can be utilised with other desktop die cutting machines (details here).
MATERIALS:
White Cardstock
Green Paper
Vellum
Glow-in-the-dark Sticker Paper
Scraps of Coloured Paper and Card
Beacon 3-in-1 Glue
Distress Ink in Walnut Stain
Distress Oxide Ink in Distressed Pistachio
Bubbles Embossing Folder
Manual Embossing/Die-cutting Machine
Silhouette Cameo
Multi-coloured LED Light String
Drinking Straw with Firework Frill
The Faux Glass Base
Cut the base pieces from white cardstock and the panels from green paper. Make an offset of the base pieces and cut them from vellum.
Before assembling, darken the bottom edge of the green panels to represent sediment in the glass.
Curl the base pieces before attaching the green panels. Align the vellum pieces and bend over the right edge and adhere it on the underside of the panel with clear craft glue on the right edge only.
Before securing the vellum on the other edges add eyeballs and vellum circles. For the circles I used vellum left over from another project which had been 'smooshed' with Distress Oxide Inks.
Make eye balls with circles cut from glow-in-the-dark sticker paper, with smaller circles adhered on top (white card could be substituted). Draw on red veins to the eyeballs if desired.
Continue to assemble the base as directed in the designer's instructions.
The Green Foam
Since the completed base is thicker because of the extra vellum layer, enlarge the lid pieces slightly to compensate (base pieces and panels).
To allow light to shine though the top, add a large circular hole to the top of the lid on both lid pieces with sufficient width to cover the tabs. Cut from white cardstock.
Cut the panels from vellum. Duplicate the 10-sided shape adding a smaller hole to allow the straw to pass through. Cut that from vellum.
Emboss all the vellum pieces with a bubble embossing folder.
Tint the pieces with Cracked Pistachio Distress Oxide Ink. Adhere them to the main lid piece and assemble the lid.
Additional Decorations
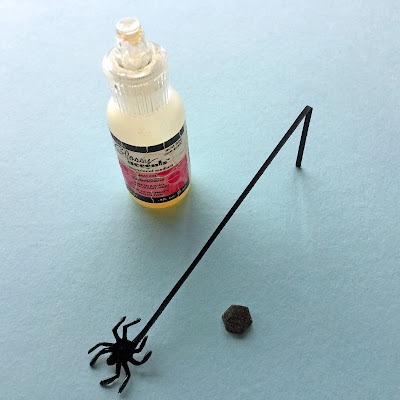
Add a dangling spider to the side of the glass.
Attach small black bats and glow-in-the-dark bubbles to the ends of the firework frill on the straw.
To Finish
Add a battery-operated white or coloured LED light string. (My lights were bundled with blue and green lights at one end and red and orange lights at the other, I left them bundled as they were).
Turn on the lights, put the lid on, and insert the straw.
Display
I displayed the brew with a 'Drink me if you dare' sign in a black bracket-shaped frame, a layered green paper and vellum background, and words in black sign vinyl.
I think this will make a great addition to my Halloween display this year.
Bye for now,
Janet, DT Member Simply Crafty SVGS
Instagram: https://www.instagram.com/craftingquine
Simply Crafty SVG Files:
Beer Glass
Files for Accompanying Stand:
3D Bracket Shaped Frame by Lori Whitlock
Drink Me Phrase by Rhonna Farrer


9 comments:
Thanks for your comment Karin :)
Awesome creation
Wonderfully creepy! Creative Blessings, Tracy x
Sooooo clever! the glow in the dark stuff is fab!
Very clever 😁 love it x
Another brilliant project that looks good with the lights on and off! Shabneez x
Oh wow Janet, this is AWESOME and super cool! x
Wonderful spooky project.
Sylv xx
Loving this Halloween project
Post a Comment